
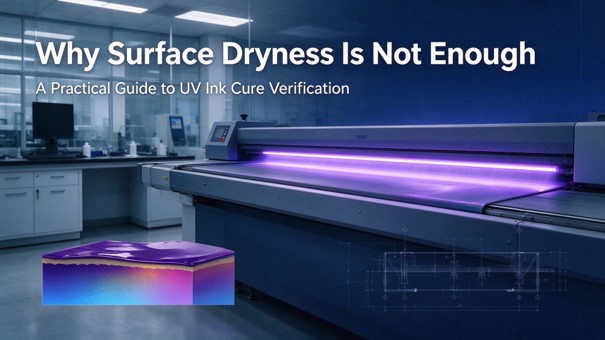
1. The Touch Test Is Only the First Signal
UV printing is widely used in industrial production because it offers fast drying, strong scratch resistance, excellent color stability, and compatibility with many substrates. However, one of the most common quality-control mistakes is also one of the easiest to make: judging UV curing by touch alone.
When UV ink is exposed to ultraviolet light, the surface may quickly become dry and non-tacky. The ink film may appear set, and production staff may be tempted to release the part to the next process. But surface dryness is only a macroscopic observation. It does not guarantee that the entire ink layer has completed sufficient polymerization, formed a stable crosslinked network, or achieved the required final performance.
In industrial UV printing, a part that feels dry to the touch may still fail in adhesion testing, solvent resistance testing, abrasion testing, or environmental reliability testing. This is why cure verification must move beyond “is it sticky?” and focus on the real internal changes happening inside the ink film.
2. What Actually Happens During UV Curing?
UV curing begins when photoinitiators in the ink system absorb ultraviolet energy and initiate polymerization. Reactive monomers, oligomers, and functional components then participate in the reaction, gradually transforming the liquid ink film into a solid polymer network.
From the outside, the process looks like a simple sequence of events: liquid ink, reduced flowability, surface setting, and finally cured film formation. From the inside, the sequence is far more complex: UV light absorption, reaction initiation, double bond conversion, molecular weight growth, crosslink network formation, and the development of the final film structure.
This distinction matters because the visible surface change is only the end effect of a much deeper reaction process. The real question is not whether the lamp was turned on, but how much reaction occurred at different depths throughout the ink layer.
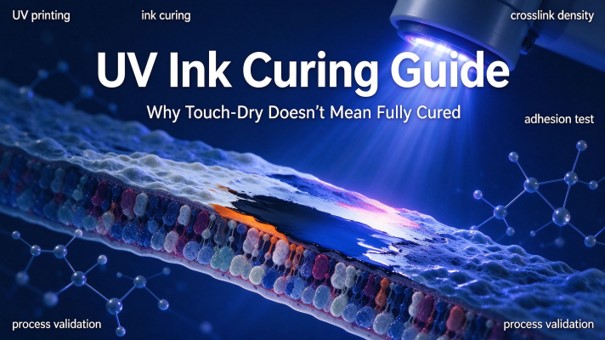
3. Four Levels of Curing: Surface, Conversion, Network, and Performance
To understand UV curing correctly, we must separate four concepts that are often confused on the production floor: surface phenomenon, reaction conversion, crosslink network structure, and final application performance. “Fully cured” is better understood as an engineering judgment than as a single measurable material parameter.
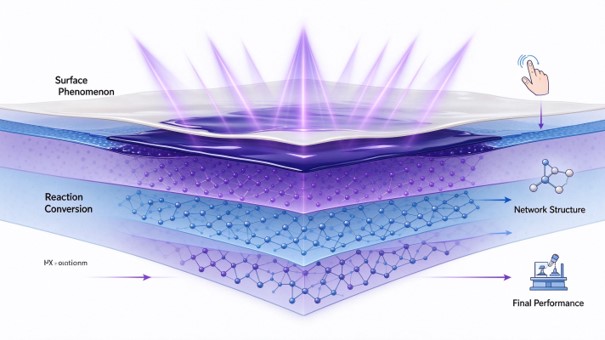
3.1 Surface Phenomenon
This is what can be seen or touched: no tackiness, surface set, no visible flow, gloss or matte appearance, and immediate shape stability. Surface observation is a useful starting point, but it is not enough to confirm cure quality.
3.2 Reaction Conversion
Reaction conversion describes how many reactive groups have participated in the polymerization process. In many UV systems, this is closely related to the consumption of double bonds. A high conversion rate means that a large proportion of reactive components have reacted, but it does not automatically mean that the film structure is optimal.
3.3 Crosslink Network Structure
After polymerization, the material forms a three-dimensional polymer network. The quality of this network depends on monomer functionality, oligomer structure, formulation balance, crosslink density, molecular weight between crosslinks, internal stress, and volume shrinkage.
Two UV systems can have high conversion rates but produce very different network structures. Similarly, higher crosslink density may improve hardness and chemical resistance while also increasing brittleness and internal stress. Conversion answers “how much reaction happened”; crosslink density answers “what kind of network was built”.
3.4 Final Application Performance
The ultimate goal of UV curing is not simply “reaction”, but reliable performance in actual use. Important indicators include:
- adhesion to the substrate
- abrasion and scratch resistance
- solvent and chemical resistance
- gloss retention and hardness
- impact resistance and flexibility
- environmental reliability and long-term stability
Surface dryness belongs to the first level; application performance belongs to the final level. They are related, but they are not equivalent.
4. Why the Surface and Bottom of the Ink Layer May Cure Differently
UV light does not pass through an ink film without loss. Photoinitiators, pigments, fillers, and other components all absorb or scatter light, so the intensity of UV energy decreases as light travels deeper into the layer.
This creates a curing gradient. Near the surface, light intensity is highest and the reaction is fastest. In the middle layer, effective energy gradually declines. Near the substrate, the available UV energy may be insufficient for the same degree of conversion.
For thin films, this gradient may be acceptable. For thick films, high-pigment inks, dark inks, or strongly absorbing systems, the bottom layer may remain undercured even when the surface feels dry. This is one of the most important hidden causes of later delamination, edge lifting, poor tape test results, and weak solvent resistance. A thicker film is not simply the same curing problem at a larger scale; it is a different light distribution problem.
5. Oxygen Inhibition Is a Separate Problem
In many free-radical UV systems, oxygen in the air inhibits polymerization at the surface. This may create the opposite situation: the interior of the film has reached a certain cure state, while the surface remains tacky or soft.
This mechanism is different from bottom-side undercuring. Oxygen inhibition means the interior may be cured while the surface stays sticky. Light attenuation means the surface may be dry while the bottom layer stays undercured. Therefore, surface tack is not a reliable indicator of full-layer cure, and surface dryness is not reliable either.
6. Higher UV Power Does Not Automatically Mean Better Cure
When curing problems appear, increasing UV power is a natural response. Sometimes it works, but it is rarely the complete answer.
UV curing depends on an entire system of matching factors:
- light source spectrum
- photoinitiator absorption characteristics
- irradiance and exposure dose
- exposure time and line speed
- lamp-to-substrate distance and angle
- ink film thickness
- pigment and filler content
- substrate type
The emission spectrum must first match the photoinitiator system. Equipment distance, irradiation angle, line speed, and exposure method then change how much light actually reaches the ink film. A higher power percentage can raise surface energy without correcting a spectral mismatch, an insufficient dose, or an over-thick film. Process validation should therefore focus on the resulting cure state of the film, not on a single power setting.
7. Practical Verification Steps for UV Print Production
The right order of judgment is not “how does it feel”, but “phenomenon, conversion, network, performance”. The following sequence moves from the simplest shop-floor check to the most rigorous laboratory evaluation.
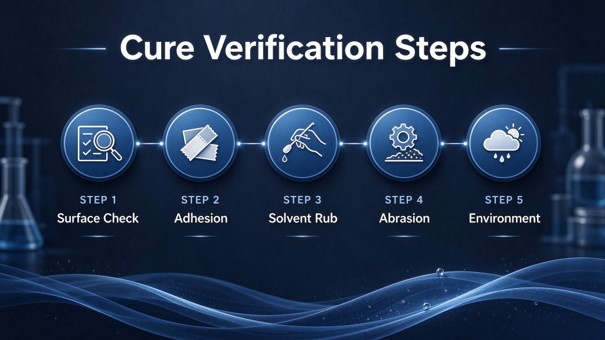
7.1 Step 1: Surface Observation
Check whether the ink film is dry and non-tacky, and whether there is abnormal flow, wrinkling, orange peel, or surface defects. Record the observation, but treat it as an entry point rather than a conclusion.
7.2 Step 2: Adhesion Testing
Use cross-hatch and tape pull testing to evaluate whether the cured film bonds properly to the substrate. Poor adhesion is often an early sign of incomplete curing at the ink-substrate interface or of incorrect surface preparation.
7.3 Step 3: Solvent Rub Testing
Solvent rub testing is one of the most effective quick checks. A cotton swab soaked in solvent is rubbed across the cured surface under a fixed load and number of strokes. If the ink softens, smudges, dissolves, or loses gloss easily, the crosslink network is likely insufficient. Common solvents include acetone, isopropyl alcohol and MEK; the exact conditions should be defined by product requirements.
7.4 Step 4: Abrasion and Scratch Testing
A film that looks good initially may fail after friction or mechanical contact. Abrasion testing verifies whether the network has reached practical mechanical strength, and it exposes films that are only skin-cured.
7.5 Step 5: Environmental Reliability Testing
Many curing defects do not appear immediately. They may emerge after high temperature, high humidity, thermal cycling, UV aging, chemical exposure, or long-term storage. Environmental testing is therefore essential for functional and durable products.
7.6 Step 6: Instrumental Analysis for R&D and Quality Control
For more precise evaluation, analytical instruments can measure the internal cure state directly:
- FTIR, to evaluate double bond conversion
- gel content testing, to reflect the degree of crosslink formation
- DMA or TMA, to characterize modulus, glass transition and network structure
- hardness and indentation testing, to evaluate surface mechanical properties
- environmental chambers, to accelerate reliability evaluation
8. Conclusion: Curing Is a Process, Not an On/Off Switch
UV curing is not a simple binary state. It is a continuous process that depends on formulation, film thickness, light source conditions, exposure strategy, and substrate properties.
Surface dryness is only the first observation. A controlled UV process should verify the entire chain: surface phenomenon, reaction conversion, crosslink network, and final application performance. The real definition of “fully cured” is not that the surface is no longer sticky, but that the ink layer has achieved sufficient reaction conversion, a stable network structure, and consistent final performance under actual production conditions.
For industrial UV printing, the most reliable process is never based on touch alone. It is based on structured testing, process validation, and continuous production control.