
Small ink dots, big losses. Ink flying and splattering — the #1 headache for UV printing operators — fully explained in one article.
01 What Exactly Is Ink Flying / Ink Splattering?
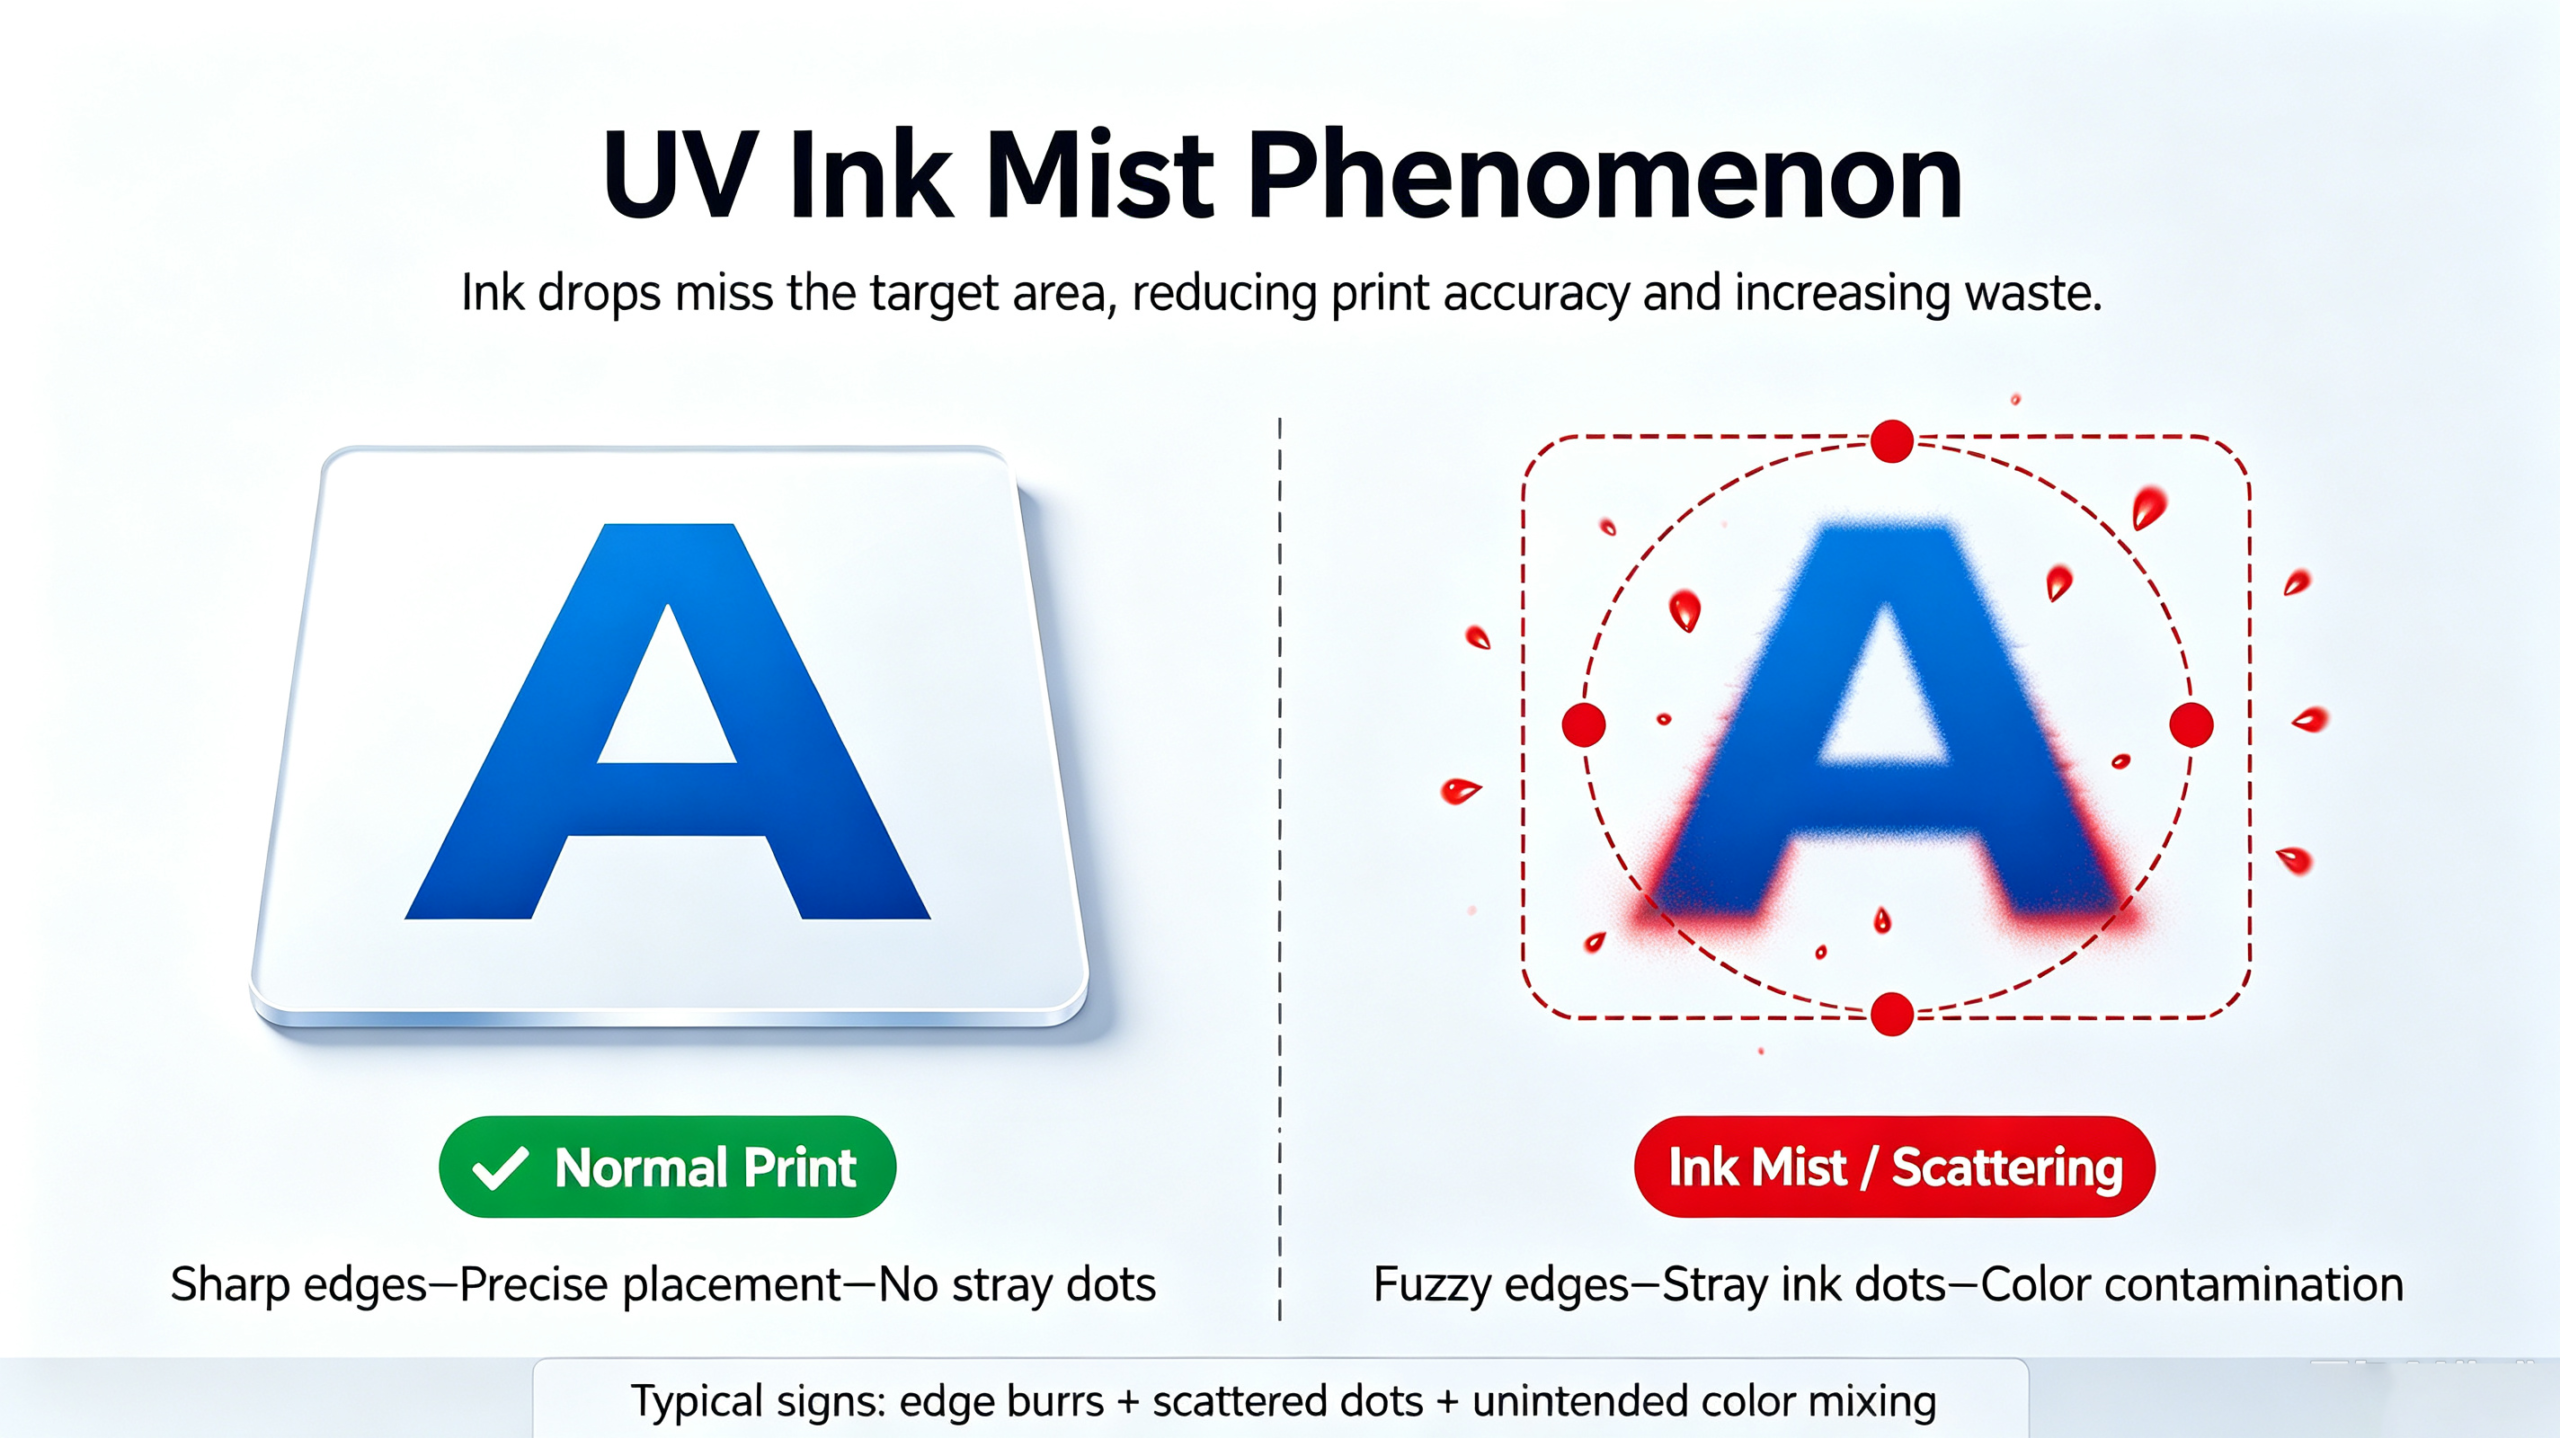
Ink flying (also called ink mist or overspray) simply means the ink doesn't land where it's supposed to.
Typical symptoms:
- Blurry edges on printed patterns, like "fuzzy borders"
- Tiny scattered ink dots around the pattern
- Unexpected color mixing in transition areas
- Noticeable ink buildup around the printhead
Once a printer suffers from persistent ink flying, the rework rate increases by an average of 15%–25%, and material waste rises by about 10%–20%. Over a year, that can easily cost you tens of thousands of dollars in hidden losses.
02 The 6 Culprits — Check Them One by One
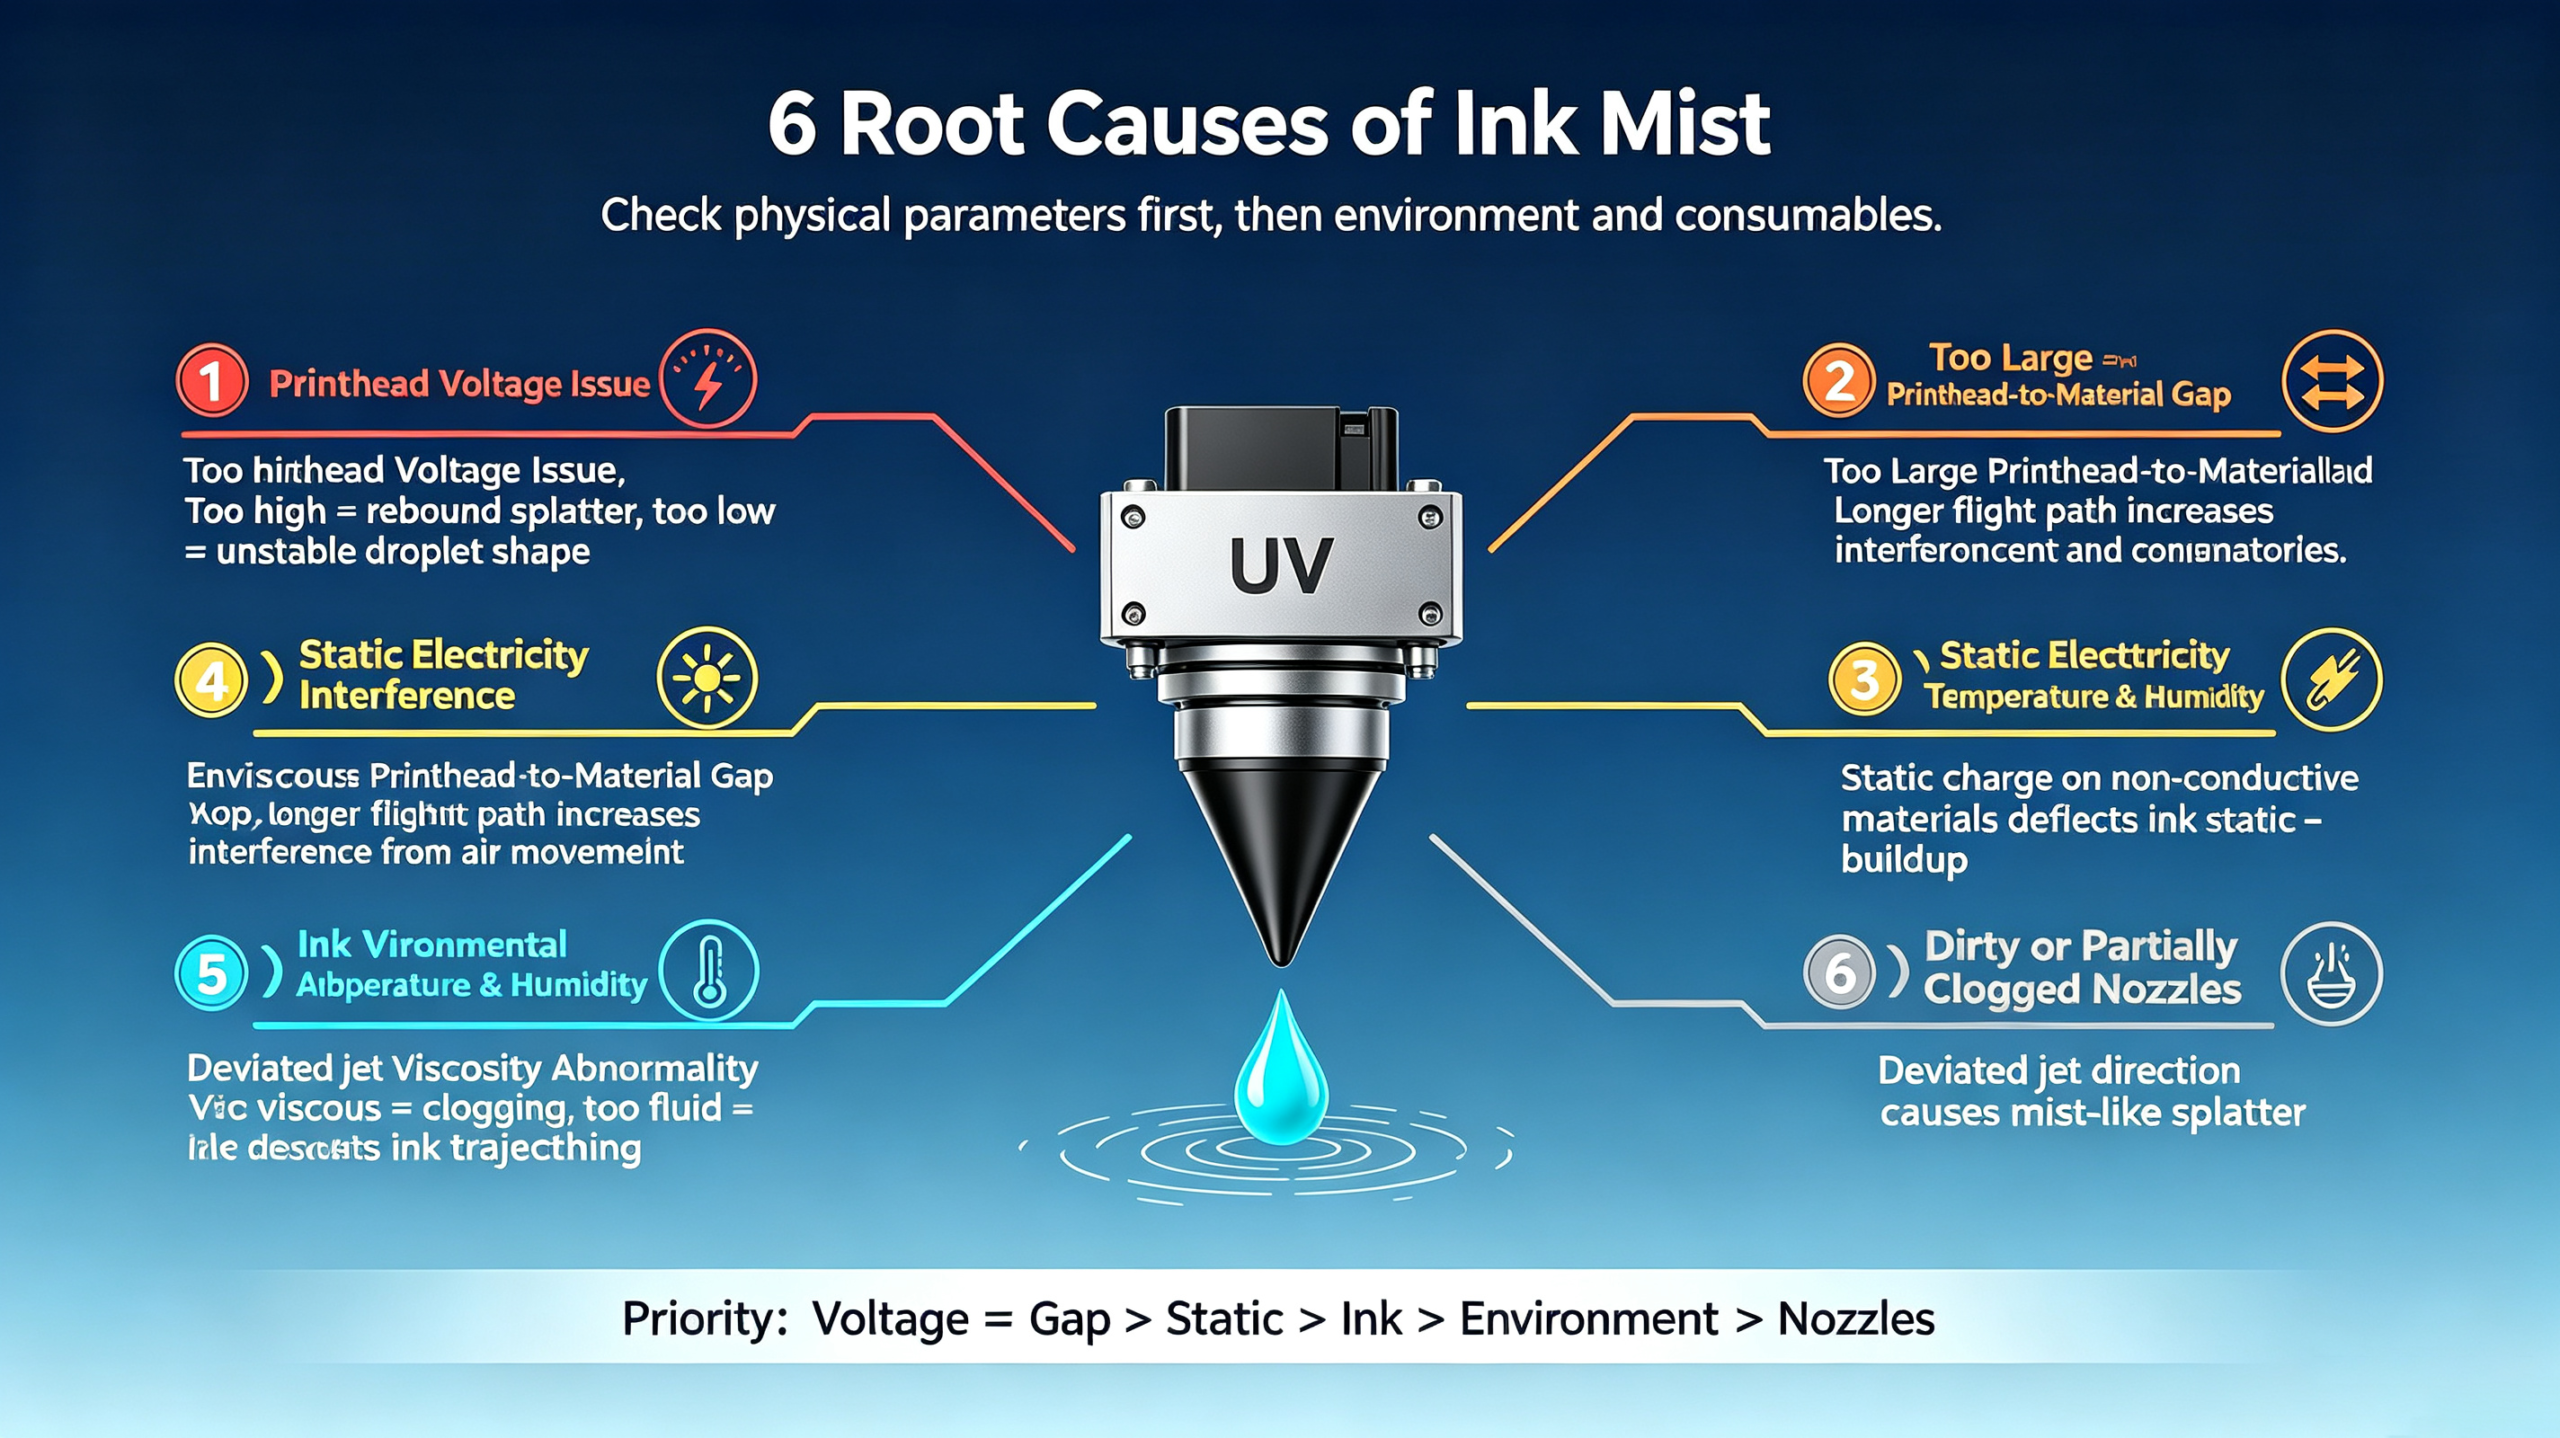
Ink flying isn't "bad luck." It has clear physical causes. The six causes below are ranked by priority of resolution — start from #1 and work your way down.
🔴 Culprit #1: Incorrect Printhead Voltage (Priority: Highest)
Too high voltage → ink droplets fire too hard, bouncing and splashing off the substrate.
Too low voltage → droplets can't form properly, also causing scattering.
Solutions:
- Strictly follow the printhead manufacturer's voltage specifications (industrial printheads typically recommend 7.0V–9.5V, but always check the exact datasheet).
- Always print a test pattern after adjustment to check droplet shape.
- Avoid overly aggressive waveform settings.
⚡ Getting this step right can immediately improve over 60% of ink flying issues.
🔴 Culprit #2: Printhead-to-Substrate Gap Too Large (Priority: Highest)
The farther the printhead is from the substrate, the longer the droplet flight path — and the higher the risk of disruption from airflow and static interference, leading to poor landing accuracy.
Benchmark references:
- Flat substrates: 1.5mm – 3mm
- Slightly textured substrates: no more than 2mm
- Over 5mm → ink flying is almost guaranteed
Solutions:
- Use the printer's auto-height detection feature whenever available.
- Before printing, confirm the vacuum table is working and the substrate lays flat (no warping).
- For uneven surfaces, switch to a high-waveform firing mode.
🟠 Culprit #3: Static Interference (Priority: High — Often Overlooked)
This is the most underestimated factor. In dry seasons, non-conductive materials like acrylic, PVC, glass, and metal easily build up static charge, which directly deflects charged ink droplets.
By the numbers: In dry winter conditions, static-related ink flying accounts for over 30% of cases. From November to March, service requests related to ink flying in northern regions are 2–3 times higher than in other months.
Solutions:
- Install static eliminator bars or ionizing blowers on both sides of the printer.
- Ensure the printer is properly grounded — check grounding wires regularly.
- Maintain ambient humidity at 40%–60% RH.
- Optionally, treat the substrate surface with anti-static spray before printing.
🟡 Culprit #4: Ink Viscosity & Quality Issues (Priority: Medium)
Ink viscosity is a core parameter for droplet formation. Too high → clogging. Too low → excessive splattering.
Reference standard:
- Recommended UV ink viscosity range: 8–12 cP (centipoise)
- Different batches may vary — always run a small sample test before full production
Solutions:
- Use the manufacturer-recommended inks or verified compatible alternatives.
- Never mix different ink brands.
- Store ink at 15°C–25°C, away from direct sunlight.
- Use opened ink within 3 months.
🟡 Culprit #5: Abnormal Ambient Temperature & Humidity (Priority: Medium)
Temperature and humidity are the underlying environmental factors that directly affect ink behavior and static buildup.
Recommended range:
- Temperature: 20°C – 28°C
- Relative humidity: 40% – 60% RH
Solutions:
- Equip your workshop with a constant temperature and humidity system.
- Place a thermo-hygrometer next to the printer for real-time monitoring.
- Ensure A/C vents do not blow directly onto the printing area.
🟢 Culprit #6: Dirty or Partially Clogged Nozzles (Priority: Medium)
Nozzles that haven't been cleaned for a while will fire droplets at deviated angles, creating a mist-like scattering effect.
Solutions:
- Run a nozzle check every day before starting work.
- If you see missing or deflected dots, perform an immediate cleaning cycle.
- Replace the ink mist filter regularly (recommended: once a month).
- For severely clogged nozzles, contact professional service — never disassemble the printhead yourself.
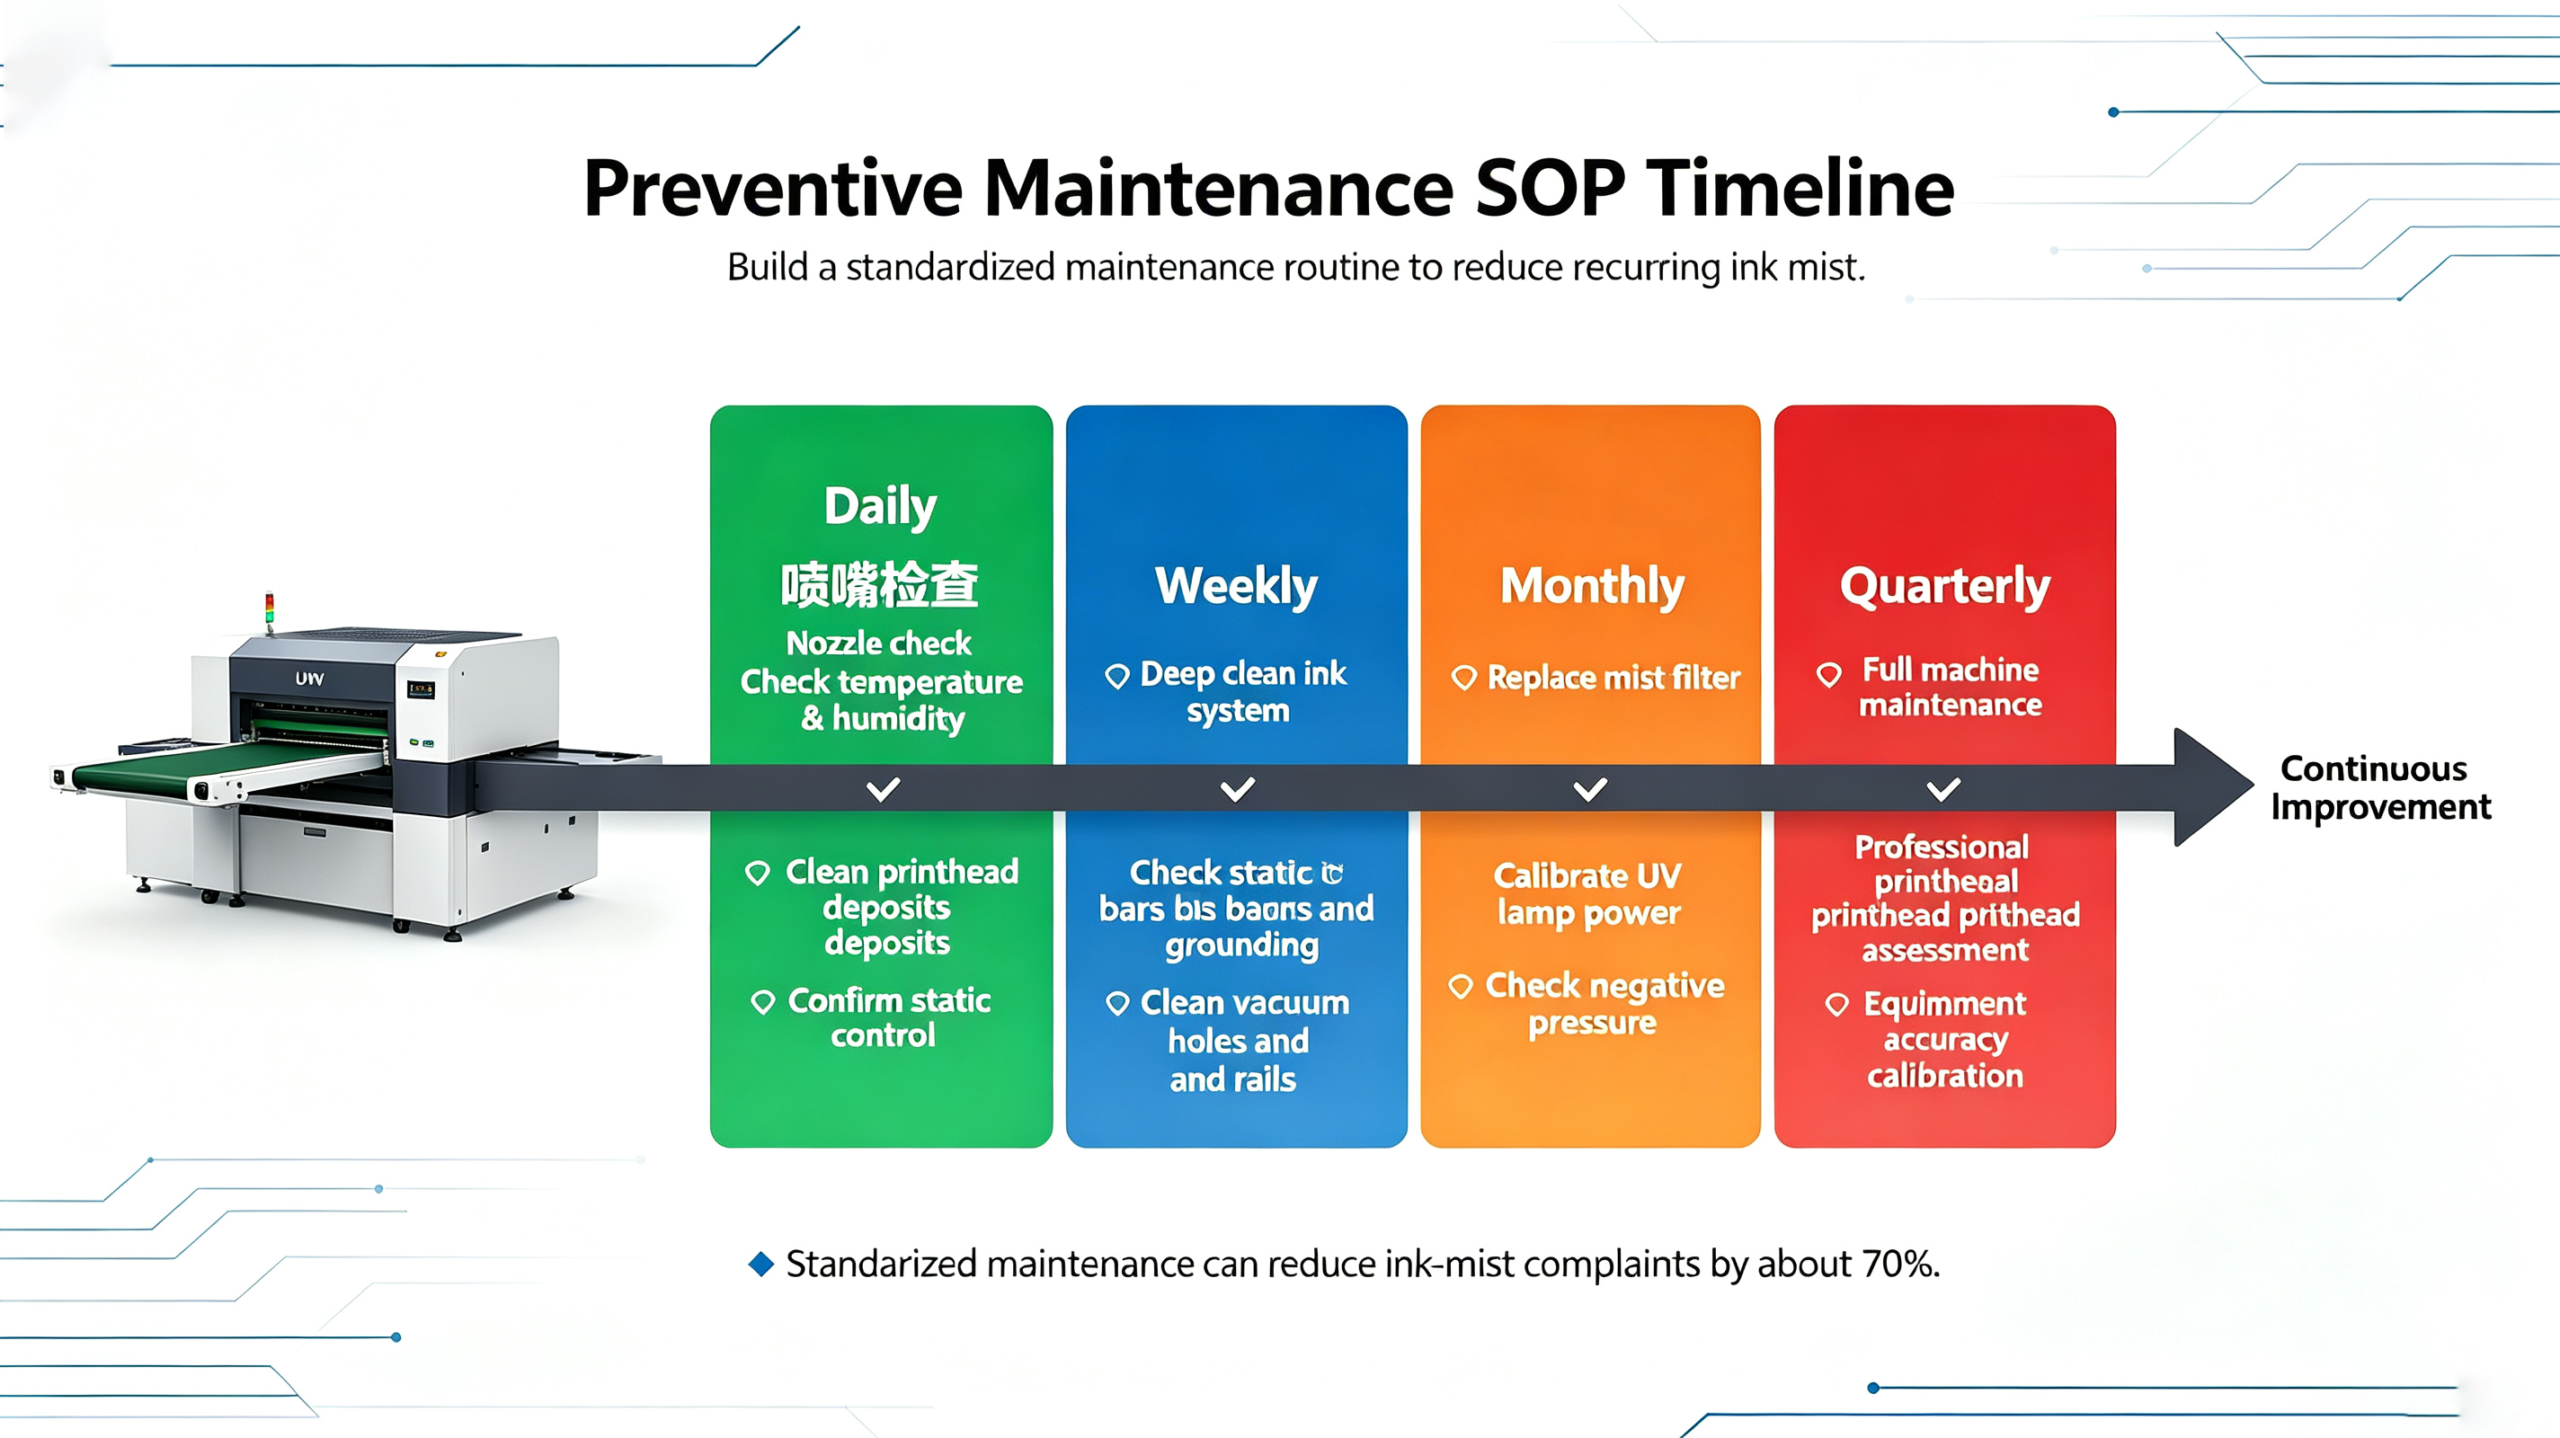
03 Priority at a Glance
| Cause | Difficulty to Fix | Speed of Improvement | Check Order |
| Incorrect voltage | Low | ⚡ Immediate | Step 1 |
| Excessive head gap | Low | ⚡ Immediate | Step 2 |
| Static interference | Medium | 1–3 days | Step 3 |
| Ink viscosity issues | Medium | Several hours | Step 4 |
| Environment (T/H) | Medium–High | Several days | Step 5 |
| Dirty/clogged nozzles | Low–Medium | Immediate–1 day | Step 6 |
Quick reminder:
Adjust voltage and gap first → then check static and environment → finally verify ink and nozzle condition.
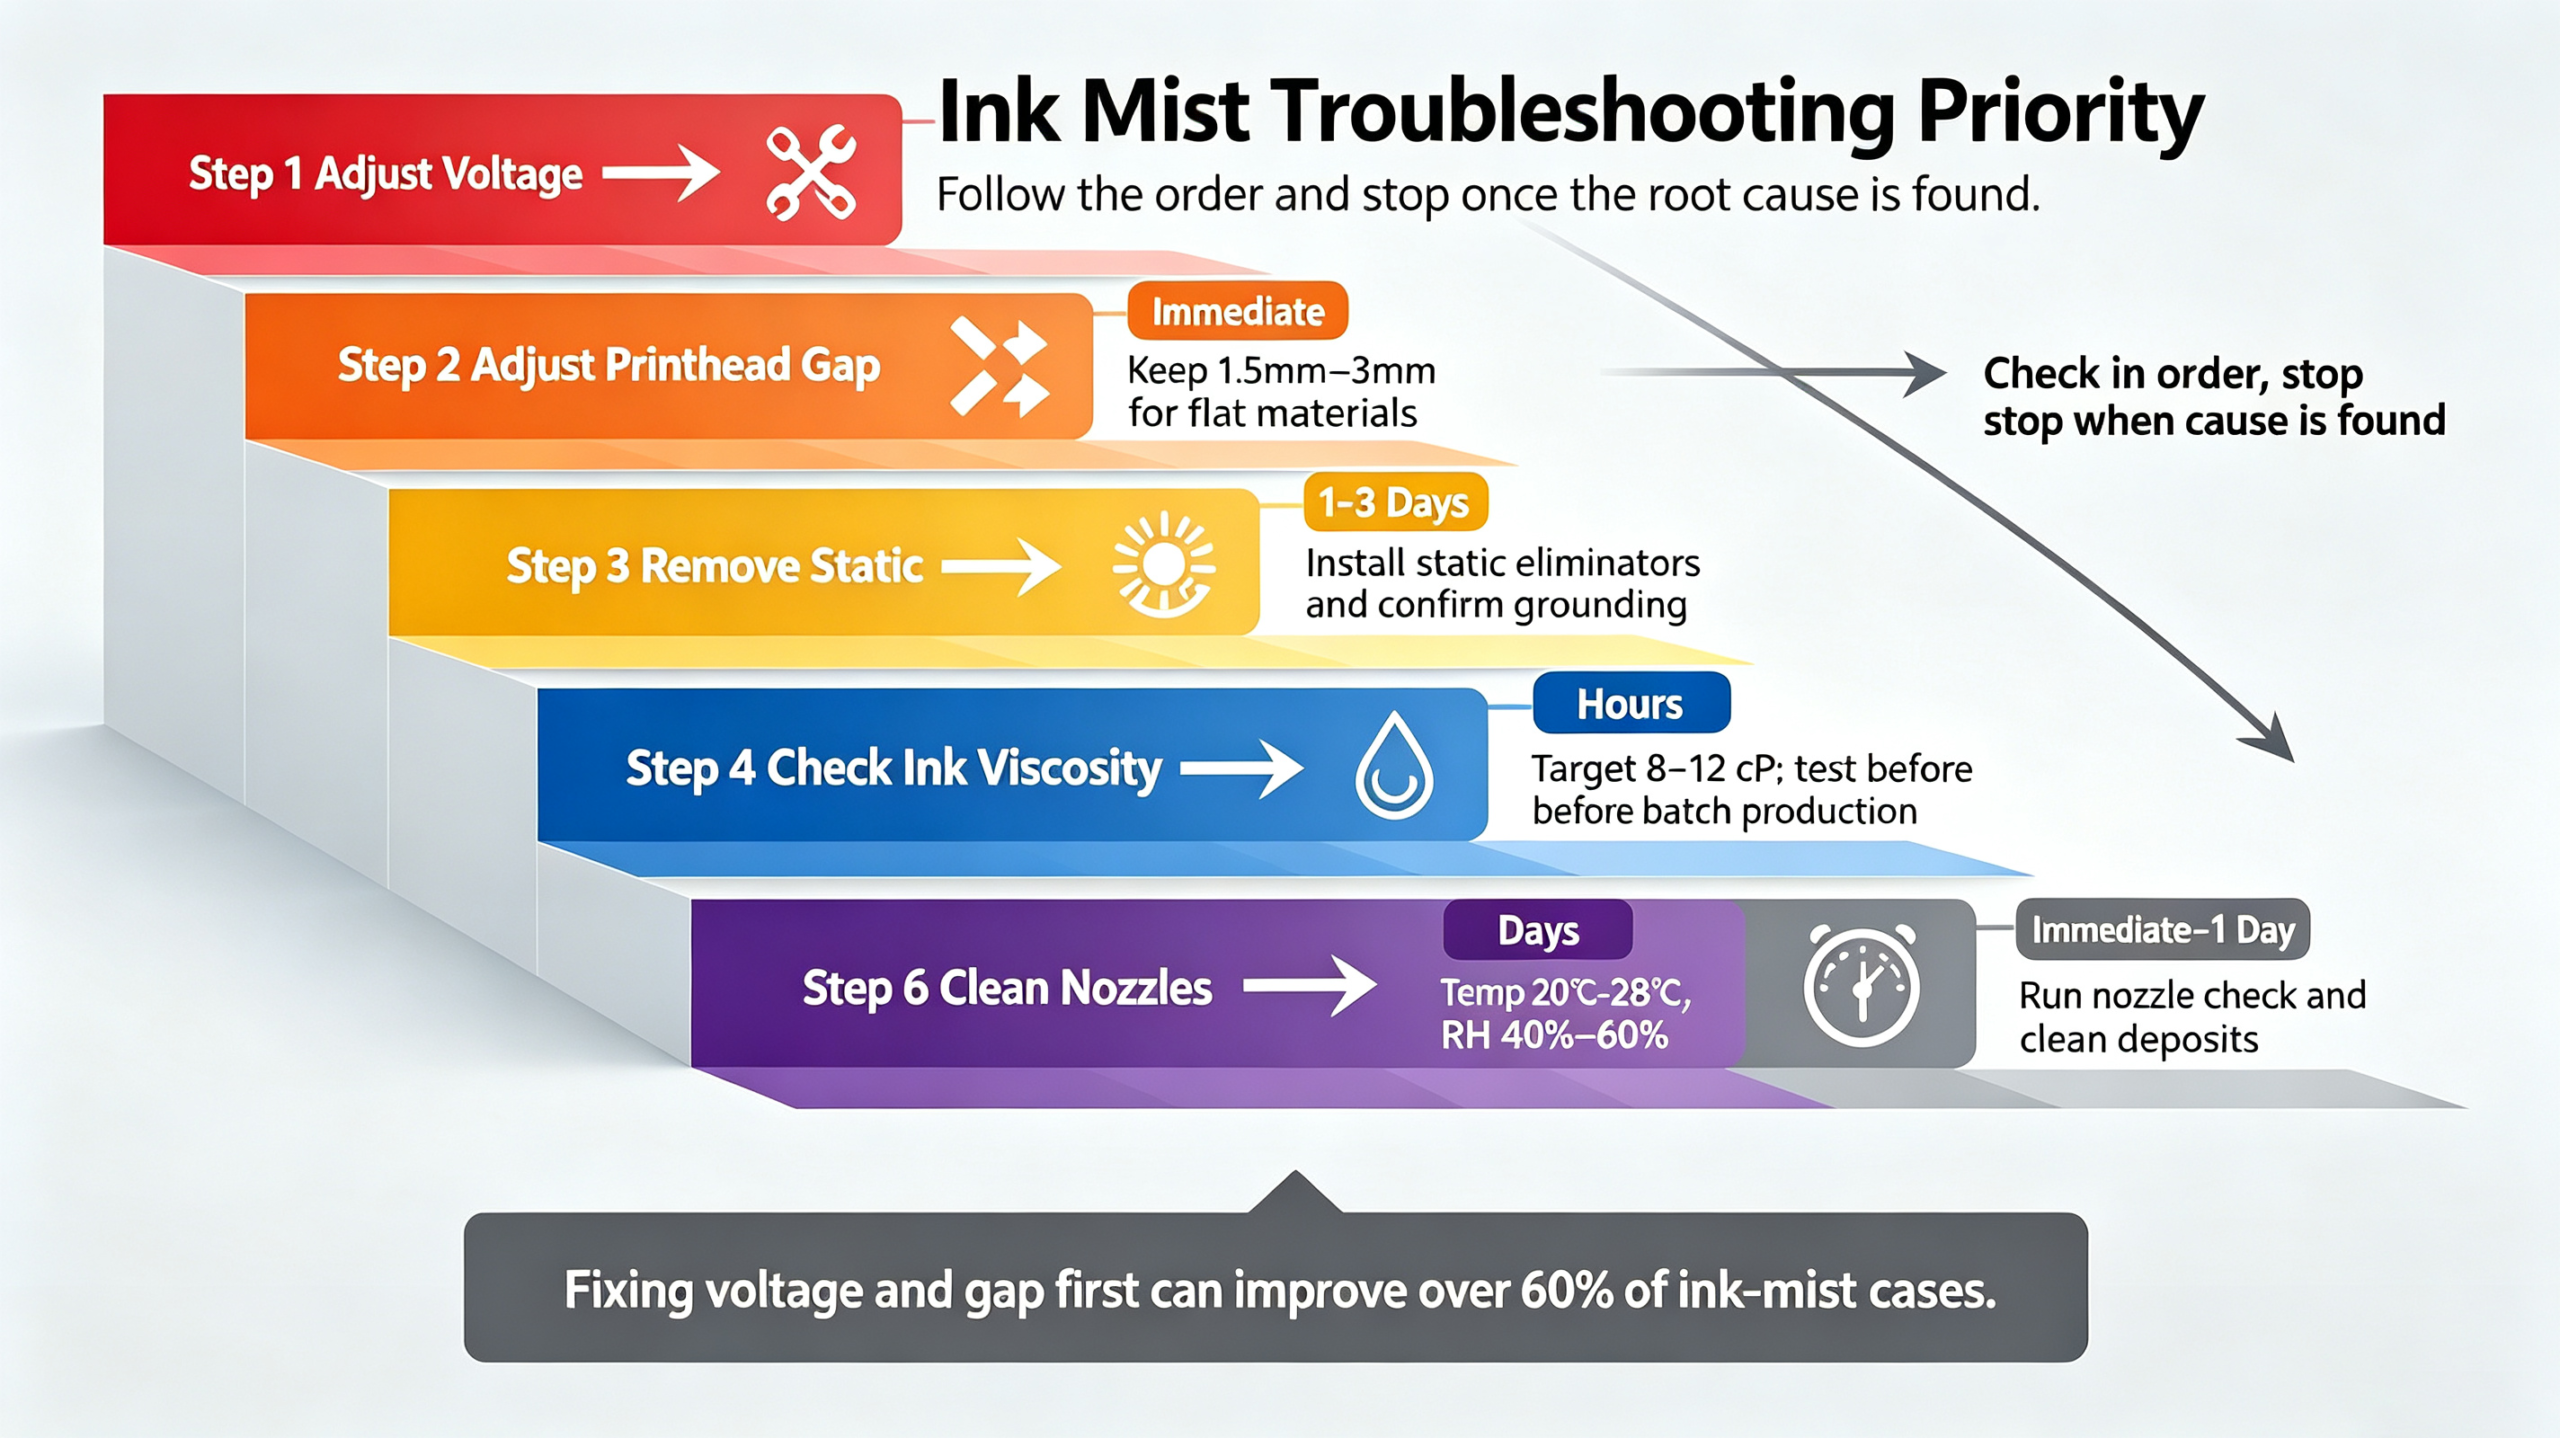
04 Preventive Maintenance SOP: Stop Ink Flying from Coming Back
The real solution isn't "fix it when it breaks" — it's build a process and prevent it from happening in the first place.
Daily Must-Dos
- ✅ Run a nozzle check at startup
- ✅ Check temperature/humidity readings
- ✅ Clean ink residue from the printhead bottom
- ✅ Confirm static elimination devices are running
Weekly Must-Dos
- ✅ Deep-clean the ink delivery system
- ✅ Inspect static eliminator bars and grounding cables
- ✅ Clean vacuum table holes and guide rails
Monthly Must-Dos
- ✅ Replace the ink mist filter
- ✅ Calibrate UV lamp power
- ✅ Check negative-pressure ink supply system pressure
Quarterly Must-Dos
- ✅ Full machine deep maintenance (recommended with service engineer visit)
- ✅ Professional printhead assessment
- ✅ Full equipment calibration
📌 Customers who follow a structured maintenance schedule report up to 70% fewer ink flying complaints than those who don't.
05 Equipment Design: The Foundation for Lower Ink Flying Risk
Operator adjustments can fix most problems, but the printer's hardware and software design ultimately determines the ceiling of ink flying control.
A well-designed UV printer for ink flying prevention typically includes:
- Stable negative-pressure ink supply — ensures consistent droplet firing pressure
- Auto-height positioning system — precisely controls head-to-substrate gap (accuracy up to ±0.05mm)
- Intelligent waveform optimization — automatically matches voltage/waveform settings based on substrate and ink
- Anti-static protection system — grounded chassis + optional ionizing blowers
- Automatic nozzle detection and cleaning — one-touch execution, no manual repeated testing
- Ink mist filtration system — captures scattered mist to keep the printhead clean
- Real-time temperature/humidity monitoring — alerts when environment goes out of range
These technologies work together to significantly reduce ink flying rates, especially in high-precision applications like acrylic signage, custom phone cases, glass decoration, and more.
06 Key Takeaways
- Ink flying isn't a mystery — the six causes have clear physical logic. Follow the priority order and you'll find the root cause.
- Voltage and head gap are the fastest and most effective fixes — getting them right can solve over 60% of cases.
- Static and humidity are the hidden culprits in winter and dry climates — proactive control is a must.
- Preventive maintenance SOPs reduce long-term costs far better than reactive firefighting.
- The printer's own design sets the upper limit for ink flying performance — pay close attention to the technical features mentioned above when choosing equipment.